My mind has been going ninety to nothing here lately with all the DIY ideas that I have rummaging around in my head thanks to the fantastic blogs that I follow and Pinterest! I have made a list and
have put the things in order of what I want to tackle. I love lists, don't you? There is no greater feeling than crossing something you have done off of your list! Anyways, I'm going to share with you some of the things I have been looking at doing and maybe you can tackle some of them and tell me how they go! :)
One of the things that's on my short term list is this little guy! We have WalMart sacks coming out of our ears and falling out of our pantry which makes it look super gross. So I'm on a mission to make this! The only thing is...we don't drink coffee, so I'm either going to buy a coffee can and give all the coffee to my mom or ask around to see if anyone has an extra coffee can laying around!
This is one of those "Why didn't I think of that" things! It's so simple and would save us sooo much time! This is definitely on my list! But again, I have to find these things, because the bread that we buy has the twisty wire kind and not these kind....looks like I'll be hitting up my mom again ;)
I haven't quite figured out how to do these...but they are pretty much totally awesome so I'm going to figure it out! I may get some white cardstock and cut into it with my exacto knife and mount it to a canvas frame? Idk but I'll figure it out eventually (probably with the help of google).
This I just want mainly because it is so cute! I loved the
Mother's Day gifts we gave our moms and I would like to have something where we could write cute stuff to each other too! Or regular stuff like "don't forget to take out the trash" or something along those lines :) But it's cute scrapbook paper and a frame! Doesn't get much more simple than that! :)
And we definitely need a dry erase calendar! We could buy some from Wal-Mart or Target, but this just looks so much more fancy! We'll see what we actually do when we start comparing prices (how much will it be to print it and buy the frame as opposed to just buying a calendar from somewhere).
I reallllly want to have some awesome jewelry organization going on in my life! When I moved out of my mom's house, I left my jewelry armoire behind and wow do I miss that thing! Luckily, my mom is willing to bring it halfway! So once I get that back and hopefully get a dresser soon, I'll be able to make cute stuff like this to house all of my jewelry! Right now all my jewelry is either in a plastic bin, a makeup bag, or a walmart sack....so I wear like three different pieces of jewelry...it's so sad!
In my head I'm picturing something along these lines on top of the dresser, but a bit more modern and organized :)
I also really want to frame the mirror in our master bathroom! I think it makes the whole bathroom look more expensive and fancy and I'm pretty sure home buyers like framed mirrors! So I'll probably get some crown molding and glue and talk the hubby into doing this with me!
This headboard rocks my socks! It's pallet wood stuck together and then the brilliant people who made this painted that love on there. It's so pretty! I want it!!!
I have also inherited a love of maps from the folks over at
Young House Love and I just love these little heart maps!! We could frame our wedding location or our house address or where we honeymooned! The possibilities are endless and suuuper cute! :)
More hearts, and I'm pretty sure there's no way that Blake would let me do this because it's so girly, but it could be done so cheaply! Just take an old book from the thrift store or a book that means something to you, cut it up into hearts and tape it to the wall and color one red! Oh it would be sooo cute!
This is just perfect for our office! I love all the cheesy sayings we could put up (like the "you are my type" pictured below). And we basically live on our computers so this would be very fitting to our lifestyles!
Leave it to Martha to do something so simple that is so awesome! She put velcro on a kitchen towel that hangs from the stove so that it wouldn't fall off! I am definitely doing this when I get a new kitchen towel (right now we just have a filler one, but I want one that is really bright and cheery like our
button monograms!)
This is awesome and would be so great for us! It's laundry baskets that you can fold your clean clothes and separate them by room and then take each laundry basket to whatever room instead of having to haul stuff a little at a time! It does require some actual building though, but it isn't that crazy, so I think I could do it! I also think I could find something that would fit this size at a yard sale or something, but laundry baskets are pretty wide so...Idk! I'm up for a challenge (especially if it means spending time with the hubby pants!)
This is awesome! It's a piece of sheet metal attached to the back of a cabinet and canisters with magnets glued to them, so you can always find what you need quickly! I don't have anywhere that I could do this, but if I did I would definitely do it! It's just so handy!
These I love for outside above the patio table. They would cast a really romantic glow I think :)
{no source}
This is what I want for the
nook that I can't figure out what to do with. I really want a bench with a shelf underneath so we could sit down and take our shoes off or whatever and it would look custom and awesome. Blake doesn't think it's a good idea because if new home buyers don't like it, it's kinda permanent, so I probably won't do this, but I like it!
Now this puppy I am in love with! The thing I wasn't in love with? The price! If I'm going to DIY something it needs to be worth the money I'm saving! This version calls for these certain orbs that are $18 for the small ones and over $20 for the large ones! That's just not cool in my book. But it looks awesome!
This one on the other hand, calls for orbs that are $1.95 for the small ones and $3.95 for the large ones! Now that's more like it! I'll definitely be trying this out soon....well actually I may have to wait because I'm not sure prospective home buyers would like this....and I would want to take it with me not leave it with the house! So I'll just have to decide what to do :) But I know this is in my future sometime! (btw, the cheaper orbs are from
here)
This is another DIY lighting project I want to try! We have a small light above our sink in the kitchen and it is just the regular light fixture that comes with a new house, but I really like these made of twine and a ball and glue...I'm considering doing this in this house, but I'm also considering waiting due to the reasons above...this wouldn't be as big of a financial investment and probably not a time investment either so I may do it anyway!
These I just love! Sherry over at young house love recently put up a
tutorial about how to attach prints to canvas, so I could definitely do this! These photos are so quaint and sweet...usually I'm all about contrast and abstract and cityscapes, but this appeals to me for some reason and I may just put it somewhere in our house!
I'm wanting some roman shades in our laundry room! I was going to do some fake ones like the ones from
centsational girl, but then these don't seem to hard, so I may give these a try!
This is more lighting ideas...they look kinda girly so I don't know if Blake will go for them, but I think they look awesome!
These I want somewhere near our entry way (maybe instead of the bench, I'll put up a shelf and put these on top!). They are so springy! And super cheap! They're just thumbtacks pushed into Styrofoam balls and spray painted! So so cute!
I'm picturing some toilet paper art around the
chevron paintings in the dining room! Not something this big, but I like the idea that I could make something this epic with toilet paper rolls!
I've also considered something like this around those chevron prints...love the tone on tone words!
If I had spare boards laying around, I would do this tomorrow! I loooove this!
I thought this was so cute for a wedding gift!
I think this would be so cute in the laundry room! I would paint the clothespins a different color, but it's so easy and fitting for a laundry room, I couldn't resist!!
I'm not really sure how exactly I would do this but I'm thinking something with christmas lights....just have to figure out how to get power to them without a gross cord showing!
I like this for a table runner for our dining room table! Well...something similar...this requires sewing and since I can't sew, I'll have to make this my own but I like it!
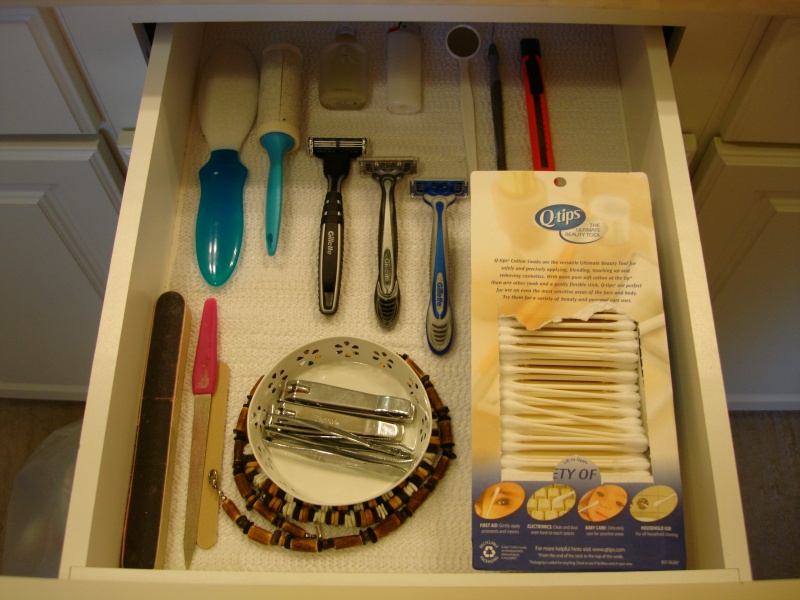
I think I'm going to do this in our bathroom drawers! I recently organized them, but now there's stuff sliding all over the place in the drawers when we go to close them or open them, so it's making everything look unorganized again. I'll probably hit up a thrift store, find some bowls like this and put some felt down to keep everything still!
I'm realizing how much lighting I have in this post....whoa. But they're so cute and simple!! This is book pages cut to be round on the end glued to a paper lantern! How simple is that??
And finally, I'm thinking something along these lines for above the TV in our living room! I love the saying, but it also ties into a cinematic feel which I've come to find that we both like!
So there you have it! A million pictures full of fantastic ideas! Do you see now why my mind is running around like a chicken with its head cut off?? But not to worry because I made a list! Hope you all have a great weekend!!! :)