As I mentioned in
this post, I searched forever for some cute outdoor pillows but to no avail, so I had to make some! And I can't sew....so I just had to rely on my stitch witchery and my creativity! Here's how they turned out:
Here's the steps to making your own no sew envelope pillow!
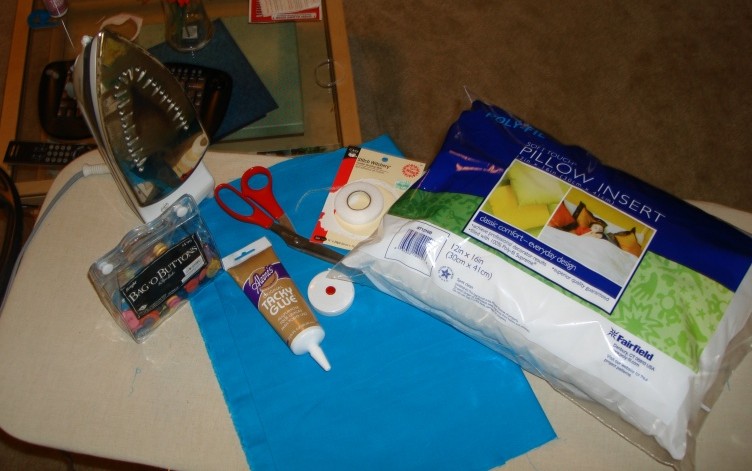
1. Gather Materials!
Here's what you'll need:
- A Pillow (mine was 12"x16" from Wal-Mart)
- Fabric (I got 2 yards to be safe)
- Stitch Witchery (available at craft stores, I got mine from Hobby Lobby for $2.29)
- Measuring Tape
- Glue
- Scissors
- Two Buttons
- Ironing Board
- Iron
- Velcro
- Ribbon
2. Measure your fabric
I cut my fabric to be all one piece. It makes it easier to keep things straight and you use less stitch witchery! For the width of the fabric, add one inch to the length of the pillow so you have enough room for a half inch seam on either side (for mine it was 17"). For the length of the fabric, double the width of the pillow and add half of the width of the pillow plus two inches for the seams. So for mine, which was 12", it was 12+12+6+2=32". (if you look at my picture, you'll see 31", but I would recommend adding an extra inch)
3. Cut your fabric
4. Iron Fabric so you don't have any of those nasty wrinkles on your super cute pillow :)
5. Fold your fabric to make a place for your pillow: (make sure if you're using a print that the print you want to show is face down)
Measure the width of your pillow (mine was 12") and add one inch for the seam and iron. That will make a nice fold so you don't have to worry about the measurements changing while you're making the seams and stuff. Also, to be sure your fold is even, check for symmetry by measuring different parts of the fold to be sure they are all 13" :)
6. It's time for the stitch witchery!
Place the stitch witchery between the fabric that you just folded. Then iron with the steam setting on (the stitch witchery package tells you how to do this). Do that on both sides :)
7. Flip your fabric inside out (make sure the fabric is cool so that the stitch witchery has had time to bond your fabrics together)
8. Check to be sure your pillow fits!
9. Fold the raw edges of the top piece towards the middle (about 1/4") and stitch witchery to create a pretty seam!
10. Glue Velcro sections on the top piece and where your pillow will sit so that the top piece doesn't come open.
Start by gluing down one half of your velcro (like the soft side) where the top piece naturally lays.
Then fold your top piece over and mark with a pen on the top piece where the Velcro touches.
That is where you will put your glue dot
Then put your other half of the Velcro set (like the coarse side) on your glue dot
11. Glue your button on where you would like it to go:
12. If you are making an outdoor pillow, use ribbon to secure your pillow to the outdoor furniture.
Place your pillow where you want it to sit and make a small mark for where you need your ribbon to sit:
Then glue your ribbon on top of the mark you made.
And tie a cute bow to keep your pillows in place!
And there you have it! Cute envelope pillows that required no sewing! YAY! :)
Here's some more pics if you couldn't really tell what they looked like:
In all honesty, I will probably be re-making the one on the right. I cut the length too short, so the envelope part doesn't come down far enough. I thought it wouldn't bother me, but so far it's driving me NUTS! It's not like it takes a lot of effort or money...so you may be getting an update soon with pillows that look a little more the same size lol. But it was fun figuring this out and I love that I got exactly what I wanted on my porch! I still have a few more things I want to do, like add a wreath to the door, some fabric to the table, and a plant somewhere up there but for now I'm super happy with my pillows!
What do you guys think? Have y'all attempted to make something after not finding what you wanted at a store somewhere? How did it turn out?